Fulfilment Workflow Lab
Objective
Create a fulfillment workflow that adds accounts to a group.
Complete this lab Creating and Understanding the Fulfillment Workflow before starting or at least review it to help avoid potential issues. The previous lab provides detailed explanations.
-
Login to Workflow Studio
-
Go to your Demo folder or any folder you have created containing sub folders Workflows>Application
-
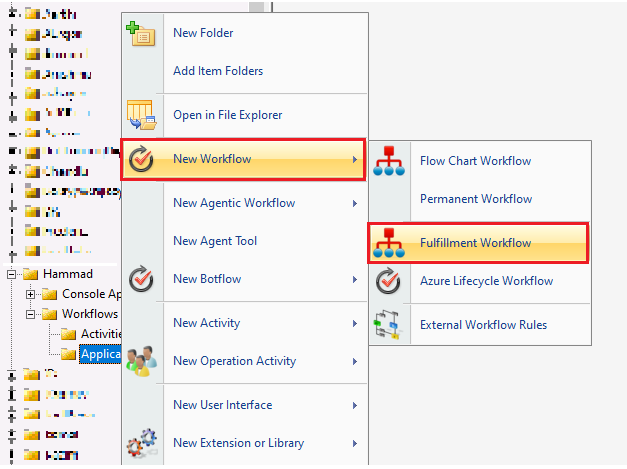
Right-click on the Application folder in the Workflow Studio and select New Workflow > Fulfillment Workflow from the context menu to create a new fulfillment workflow.
-
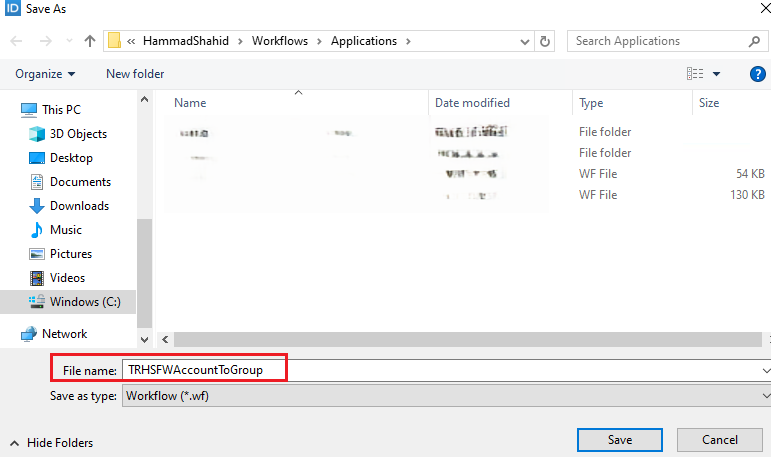
Save the workflow by clicking on the Save icon in the toolbar and provide a suitable name for the fulfillment workflow. Once you save, the workflow will reload and show you the default activities.
-
We will perform the Add Accounts to Group operation using the default operation base activity available in
EmpowerID. To find the necessary activity, go to the Activities pane or you can also find the activity by going the Search tab, enter the relevant search text, and select the AddAccountsToGroupsOperation from the search results. Afterward, drag and drop the activity to the "Drag Operation Activities Here” placeholder. Click on the newly added operation activity and provide a suitable name and description. In the Name field, enter ‘AddAccountToGroup,' and in the Description text box, enter 'Add Account To Group’.


-
Enable the operation on the Operation Base Activity.

-
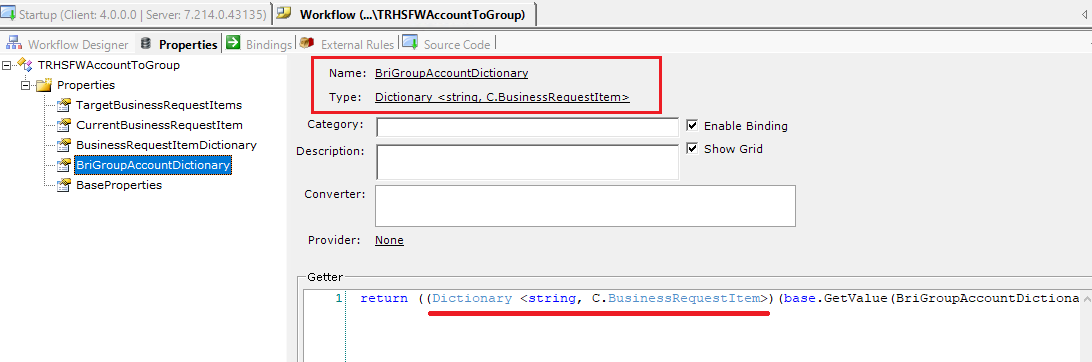
Create a property by going to the Properties tab and naming it BriGroupAccountDictionary.
-
Now, double-click the SetOperationInputs activity, or right-click on the activity and select the first option, Edit
SetOperationInputs_ExecuteCode. This will open the code editor window. -
Click the Visual Studio icon in the top bar to open the workflow or solution in Visual Studio.

-
Before making changes to the workflow in Visual Studio, first save and close the workflow window in Workflow Studio.

-
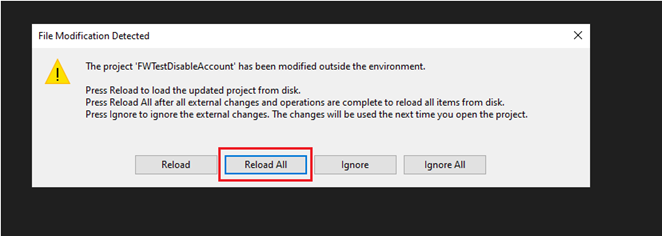
Return to Visual Studio. You may see a File Modification Detected popup. Click the Reload All button.
 9
9 -
In Solution Explorer, double-click SetOperationInputs_ExecuteCode.cs and scroll down to the Implement method.
Write the below code in the Implement method.
1  // Initialize a list to hold target group accounts that need to be added.
2  E.TList<C.GroupAccount> targetGroupAccounts = new E.TList<GroupAccount>();
3
4  // Extract distinct Assignee GUIDs from the claimed business request items.
5  var acGuids = CurrentWorkflow.ValidateBRIs.ClaimedBusinessRequestItems
6      .Select(bri => bri.RequestDataAssigneeID)      // Select the Assignee IDs
7      .Where(guid => guid.HasValue)                  // Ensure the GUID is not null
8      .Select(guid => guid.Value)                    // Extract the GUID value
9      .Distinct()                                     // Remove duplicates
10      .ToList();                                      // Convert to a list
11
12  // Extract distinct Target Resource GUIDs from the claimed business request items.
13  var grGuids = CurrentWorkflow.ValidateBRIs.ClaimedBusinessRequestItems
14      .Select(bri => bri.RequestDataTargetResourceID) // Select the Target Resource IDs
15      .Where(guid => guid.HasValue)                    // Ensure the GUID is not null
16      .Select(guid => guid.Value)                      // Extract the GUID value
17      .Distinct()                                       // Remove duplicates
18      .ToList();                                        // Convert to a list
19
20  // Retrieve Account objects based on the extracted Assignee GUIDs.
21  var targetAccounts = C.Account.GetByAccountGuids(acGuids);
22
23  // Create a dictionary for quick lookup of Account objects by their GUID.
24  Dictionary<Guid, C.Account> accountDictionary = targetAccounts
25      .ToList()
26      .ToDictionary(a => a.AccountGUID, a => a);
27
28  // Retrieve Group objects based on the extracted Target Resource GUIDs.
29  var targetGroups = C.Group.GetByGroupGUIDs(grGuids);
30
31  // Create a dictionary for quick lookup of Group objects by their GUID.
32  Dictionary<Guid, C.Group> groupDictionary = targetGroups
33      .ToList()
34      .ToDictionary(a => a.GroupGUID, a => a);
35
36  // Retrieve existing GroupAccount associations based on the current business request items.
37  var existingGroupAccount = C.GroupAccount.GetByBusinessRequestItemList(
38      CurrentWorkflow.ValidateBRIs.ClaimedBusinessRequestItems.ToXml().ToString()
39  );
40
41  // Initialize a dictionary to map a composite key to its corresponding BusinessRequestItem.
42  CurrentWorkflow.BriGroupAccountDictionary = new Dictionary<string, C.BusinessRequestItem>();
43
44  // Iterate through each claimed business request item to process group-account associations.
45  foreach (var bri in CurrentWorkflow.ValidateBRIs.ClaimedBusinessRequestItems)
46  {
47      // Create a unique key combining Assignee ID and Target Resource ID.
48      var key = string.Format("{0}_{1}", bri.RequestDataAssigneeID.Value,
49      bri.RequestDataTargetResourceID.Value);
50
51      // Map the unique key to the current BusinessRequestItem.
52      CurrentWorkflow.BriGroupAccountDictionary[key] = bri;
53
54      // Retrieve the AccountID using the Assignee GUID from the account dictionary.
55      int acID = accountDictionary[bri.RequestDataAssigneeID.Value].AccountID;
56
57      // Retrieve the GroupID using the Target Resource GUID from the group dictionary.
58      int grID = groupDictionary[bri.RequestDataTargetResourceID.Value].GroupID;
59
60      // Create a new GroupAccount instance with the retrieved AccountID and GroupID.
61      var ga = new C.GroupAccount()
62      {
63          AccountID = acID,
64          GroupID = grID
65      };
66
67      // Check if the GroupAccount already exists to avoid duplicates.
68      bool groupAccountExists = existingGroupAccount
69          .Any(a => a.AccountID == acID && a.GroupID == grID);
70
71      if (groupAccountExists)
72      {
73          // If the GroupAccount exists, update the BusinessRequestItem's process status to indicate duplication.
74          bri.ProcessStatus = 4; // TODO: Replace magic number with an enum for better readability.
75          bri.BusinessRequestItemFulfillmentStatusID = 3;
76      }
77      else
78      {
79          // If the GroupAccount does not exist, add it to the list of target group accounts to be added.
80          targetGroupAccounts.Add(ga);
81      }
82  }
83
84  // Assign the list of new GroupAccounts to the workflow's AddAccountToGroup target.
85  CurrentWorkflow.AddAccountToGroup.TargetGroupAccounts = targetGroupAccounts;
86
87  // Initialize a dictionary to map Target Resource GUIDs to their corresponding BusinessRequestItems.
88  CurrentWorkflow.BusinessRequestItemDictionary = new Dictionary<Guid, BusinessRequestItem>();
89
90  // Populate the BusinessRequestItemDictionary with entries from the claimed business request items.
91  foreach (var bri in CurrentWorkflow.ValidateBRIs.ClaimedBusinessRequestItems)
92  {
93      // Map the Target Resource GUID to the corresponding BusinessRequestItem.
94      // Note: This assumes that each Target Resource GUID is unique. If not, consider using a list.
95      CurrentWorkflow.BusinessRequestItemDictionary[bri.RequestDataTargetResourceID.Value] = bri;
96  }
- In Solution Explorer, open the SetBusinessRequestItemStatus_ExecuteCode.cs file. If you see red wiggly lines, it means it is pointing to the wrong workflow, so you need to replace it with your workflow name.
The code in SetBusinessRequestItemStatus_ExecuteCode.cs file is executed after your Operation Base Activity.
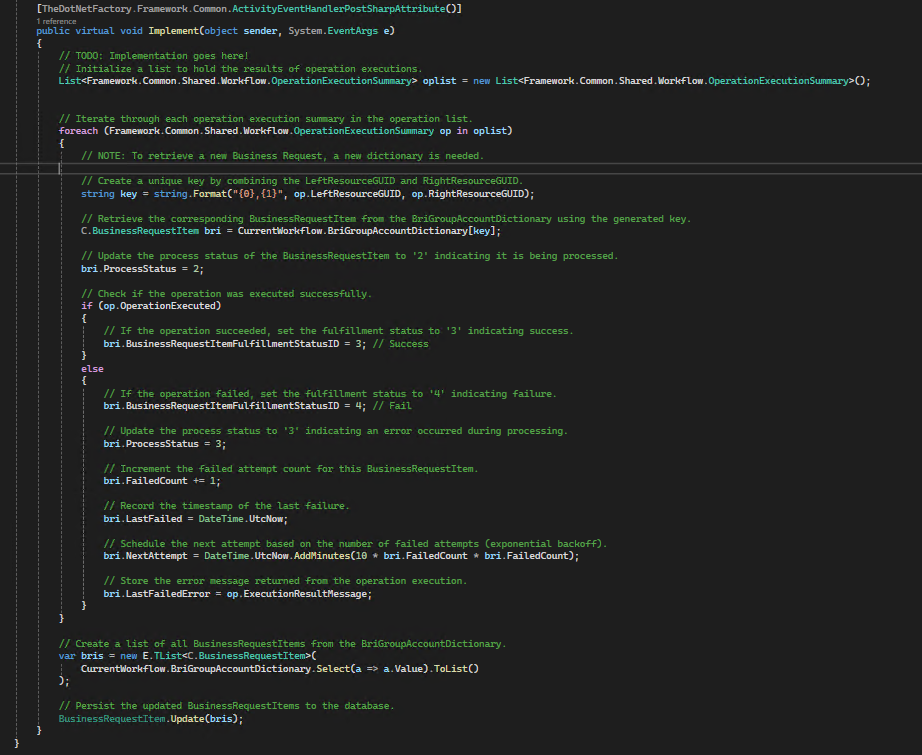
- Add the following code to the Implement method in the SetBusinessRequestItemStatus_ExecuteCode.cs file.
1  // TODO: Implementation goes here!
2  // Initialize a list to hold the results of operation executions.
3  List<Framework.Common.Shared.Workflow.OperationExecutionSummary> oplist = new List<Framework.Common.Shared.Workflow.OperationExecutionSummary>();
4
5  // Iterate through each operation execution summary in the operation list.
6  foreach (Framework.Common.Shared.Workflow.OperationExecutionSummary op in oplist)
7  {
8      // NOTE: To retrieve a new Business Request, a new dictionary is needed.
9      // Create a unique key by combining the LeftResourceGUID and RightResourceGUID.
10      string key = string.Format("{0},{1}", op.LeftResourceGUID, op.RightResourceGUID);
11      // Retrieve the corresponding BusinessRequestItem from the BriGroupAccountDictionary using the generated key.
12      C.BusinessRequestItem bri = CurrentWorkflow.BriGroupAccountDictionary[key];
13      // Update the process status of the BusinessRequestItem to '2' indicating it is being processed.
14      bri.ProcessStatus = 2;
15      // Check if the operation was executed successfully.
16      if (op.OperationExecuted)
17      {
18          // If the operation succeeded, set the fulfillment status to '3' indicating success.
19          bri.BusinessRequestItemFulfillmentStatusID = 3; // Success
20      }
21      else
22      {
23          // If the operation failed, set the fulfillment status to '4' indicating failure.
24          bri.BusinessRequestItemFulfillmentStatusID = 4; // Fail
25          // Update the process status to '3' indicating an error occurred during processing.
26          bri.ProcessStatus = 3;
27          // Increment the failed attempt count for this BusinessRequestItem.
28          bri.FailedCount += 1;
29          // Record the timestamp of the last failure.
30          bri.LastFailed = DateTime.UtcNow;
31          // Schedule the next attempt based on the number of failed attempts (exponential backoff).
32          bri.NextAttempt = DateTime.UtcNow.AddMinutes(10 * bri.FailedCount * bri.FailedCount);
33          // Store the error message returned from the operation execution.
34          bri.LastFailedError = op.ExecutionResultMessage;
35      }
36  }
37
38  // Create a list of all BusinessRequestItems from the BriGroupAccountDictionary.
39  var bris = new E.TList<C.BusinessRequestItem>(
40      CurrentWorkflow.BriGroupAccountDictionary.Select(a => a.Value).ToList()
41  );
42
43  // Persist the updated BusinessRequestItems to the database.
44  BusinessRequestItem.Update(bris);
Compile and Publish the Workflow
We compile and publish the Fulfillment Workflow in Workflow Studio the same way we publish our UI workflows. Once published from Workflow Studio, we also publish them through the EmpowerID Web UI.
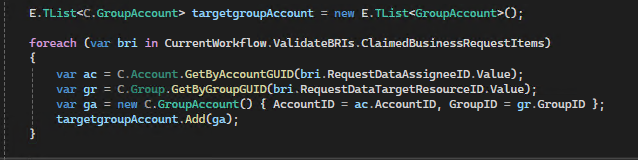
The following is not the recommended way to retrieve accounts and groups from the database.
1  E.TList<C.GroupAccount> targetgroupAccount = new E.TList<GroupAccount>();
2
3  foreach (var bri in CurrentWorkflow.ValidateBRIs.ClaimedBusinessRequestItems)
4  {
5      var ac = C.Account.GetByAccountGUID(bri.RequestDataAssigneeID.Value);
6      var gr = C.Group.GetByGroupGUID(bri.RequestDataTargetResourceID.Value);
7      var ga = new C.GroupAccount() { AccountID = ac.AccountID, GroupID = gr.GroupID };
8      targetgroupAccount.Add(ga);
9  }